Creating a grid with Game Maker Studio
If you want to create a checkerboard level for a chess game, or a turn-based game like Advance Wars 2 (which, by the way, is a fantastic game, if you’re not familiar, give it a try!), you’re in the right place to start. In this tutorial, we’ll learn how to create a grid using a 2-dimensional array. Then, we’ll fill this grid with different objects contained in our level.

Quick introduction: the 2D table
When I talk about a 2D array in GameMaker Studio, it’s simply an array where each entry contains… another array. Most development languages have this type of variables, and it’s essential in game development. This way, we can store a lot of information in an orderly manner, whether it’s our future level or a list of characters and their favorite colors:
// Player
array_2d = [
    ["Mario", "Red", 1],
    ["Luigi", "Green", 2],
    ["Peach", "Pink" , 3]
];

// Output result
array_2d[0,0] = "Mario";
array_2d[0,1] = "Red";
array_2d[0,2] = "1";
To learn more about arrays in Game Maker Studio, I invite you to visit this documentation page.
Initialization and creation of the grid
To begin, we will create an object called oGrid and initialize a 2D array in its create event, which will serve as our level. We want to have a level of 20 squares in length and width, with squares of 32 pixels.
// Create event oGrid

depth = -1000;

// Width & Height size
gridWidth  = 20;
gridHeight = 20;

// Box size
boxSize = 32;

// Create 2D array filled with 0
for(var i = 0; i < gridWidth; i++){
    for(var j = 0; j < gridHeight; j ++){
        global.grid[i, j] = 0;
    }
}
Let’s place this object in our room and… Congratulations! We now have an object oGrid that contains a 2D array:
depth -1000This way, the grid is above everything elsegridWidthandgridHeightrepresent the size of our gridboxSizerepresent the size of each boxglobal.gridthe variable containing our grid, currently all the cells contain the value 0
As you’ve seen, we’re using the word ‘global’ to define our grid. Being an essential element of our game, and since we’ll often be using it, it’s better to use this type of variable.
A basic description of a global variable is one that, once declared, it belongs to no instance in particular and yet can be accessed by all.
Game Maker Studio
Drawing the grid using the draw_line() function
To visualize our 2D array, we can use the debug tool provided by Game Maker Studio, then examine what the global.grid variable contains. The second solution is to draw it on the screen. Since this solution makes our life easier during the debugging phase, here’s what we need to write in the draw event of the oGrid object to display our grid:
// Draw event oGrid
// Set opacity & color
draw_set_alpha(.5);
draw_set_color(c_green);
// Loop trought each row and column
for (var i = 0; i < gridWidth; i+=1){
draw_line(0, i*boxSize, room_width, i*boxSize);
}
for (var j = 0; j < gridHeight; j+=1) {
draw_line(j*boxSize, 0, j*boxSize, room_height);
}
// Reset opacity & color
draw_set_color(c_white);
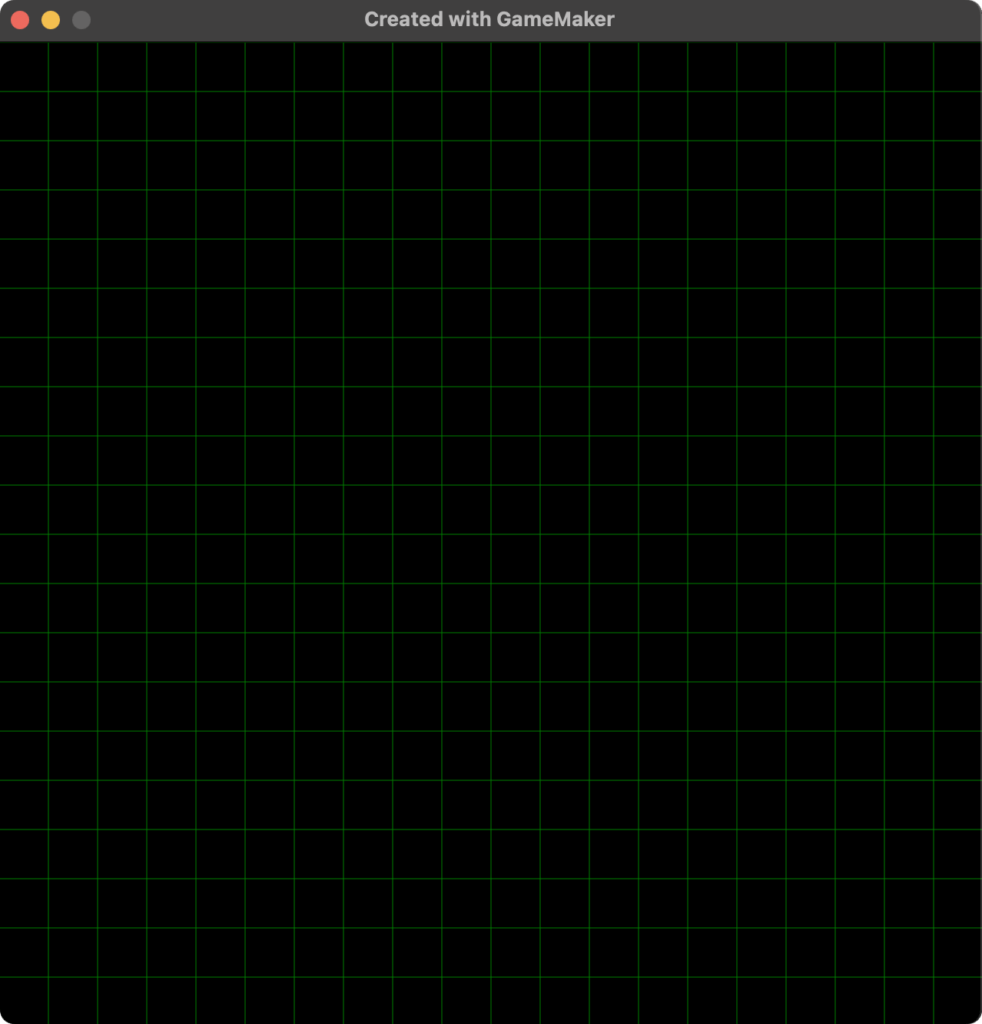
draw_set_alpha(1);With these few lines of code, we now display the 400 cells (20 * 20, I’m not great at math, but here, it’s good) of our level:
draw_set_alphacontrol the opacity and color of the line- Each
forloop trough the grid draw_linedraw each cell of our grid
Adding wall to the level
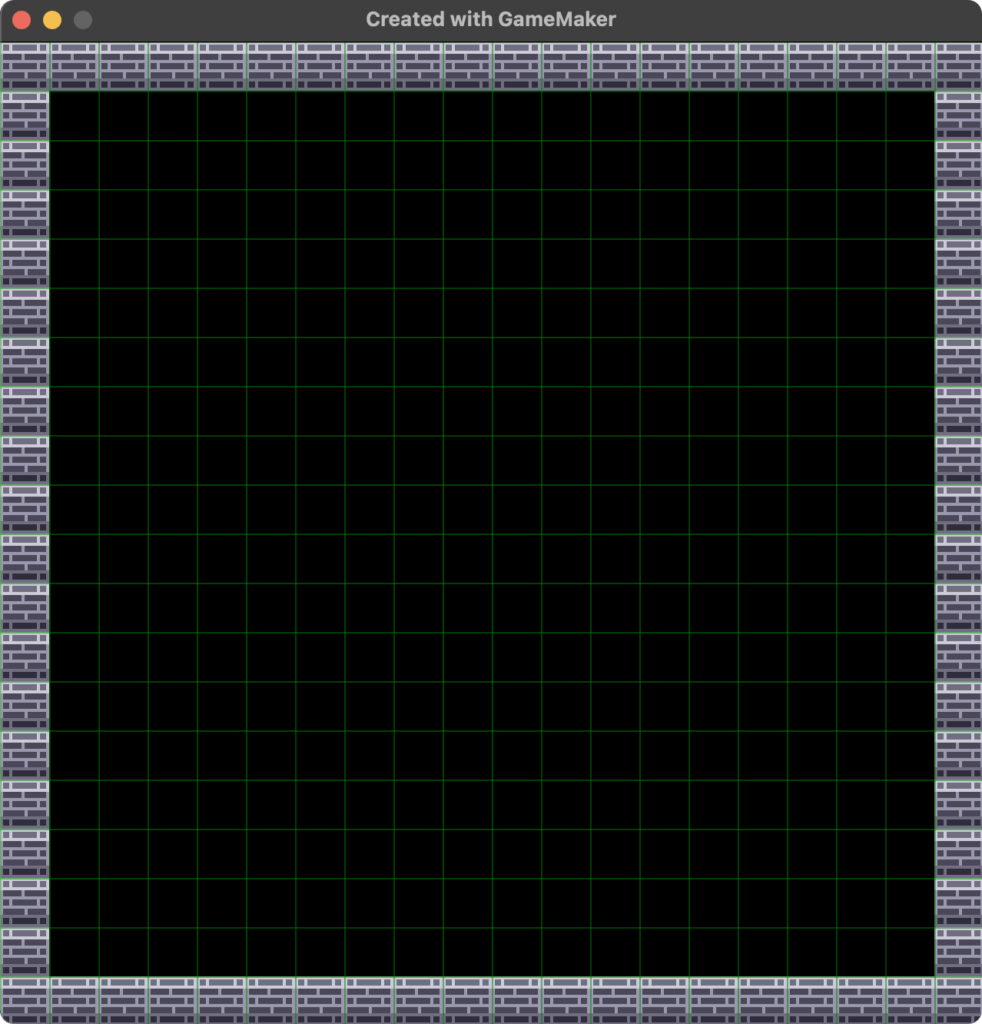
Let’s add elements to our level, and then transfer them into our grid. I suggest we add walls: for this, we need to create an object called oWall and assign it a sprite. For this tutorial, I recommend using a sprite of 32px by 32px.
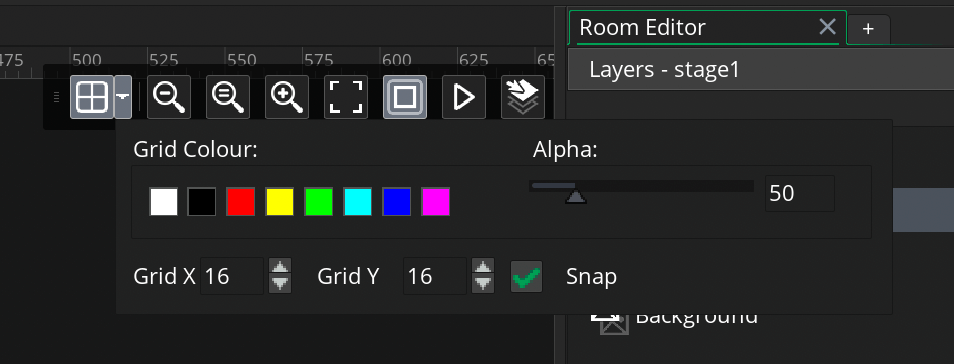
Then, let’s use the room editor available in Game Maker to place the object in question in the level. To make things easier, let’s set the grid size to 32px and use the snap feature, so that the elements will always be positioned on a multiple of 32.
At this stage, we have a grid drawn and objects in our level, but the two are not linked. Indeed, the objects are present in the room, but at no point have we added them to our global.grid variable. I won’t keep you in suspense any longer, that’s what we’re going to do now.
Inserting the walls into the grid
// Create event oWall

// Array position
var _x = x / oGrid.boxSize;
var _y = y / oGrid.boxSize;

// Add id to the array
array_set(global.grid[_x], _y, id);
Congratulations, each oWall object in our room is now added to our grid upon its creation. Be careful, for this to work, make sure that the oGrid object is created before your oWall objects in the creation order of your room, otherwise you will be trying to access a variable that doesn’t exist yet.
Adding objects to multiple cells at once
Imagine a world where one of your walls measures 32px wide by 16px high. With our code, it will only be added to the cell where its origin is located, and not to all the cells it overlaps. Here’s how to solve this problem:
// Create event oWall

// Array position
var _x = x / oGrid.boxSize;
var _y = y / oGrid.boxSize;

// Obj size
var _width  = sprite_width / oGrid.boxSize;
var _height = sprite_height / oGrid.boxSize;

// Add the id of the object on the grid
for (var i = 0; i < _width; ++i) {
    for (var j = 0; j < _height; ++j) {
        // Add id to the array
        array_set(global.grid[i + _x], j + _y, id);
    }
}- We calculate the size of the object relative to its variables
sprite_widthandsprite_height - We translate this into the number of cells
/ oGrid.boxSize - We loop through these and modify
array_set()to add the object to the respective cells
Detect wall contained in the grid
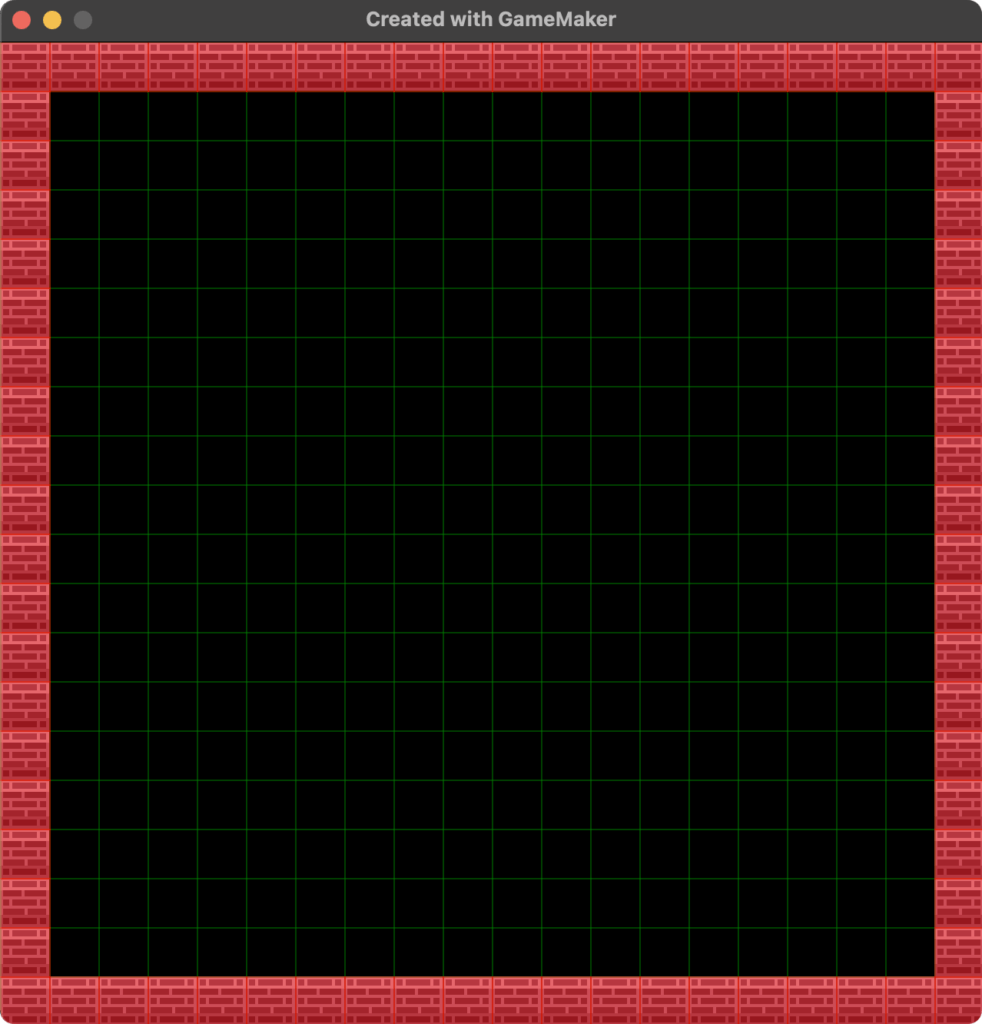
That’s great, now our grid contains the identifiers of the objects added to the room. Let’s try to modify our code to visualize the grid in order to display the cells blocked by walls.
// Draw event oGrid

// Set opacity & color
draw_set_alpha(.5);
draw_set_color(c_green);

// Loop trought each row and column
for (var i = 0; i < gridWidth; i+=1){
    draw_line_width(0, i*boxSize, room_width, i*boxSize, 1);
}

for (var j = 0; j < gridHeight; j+=1) {
    draw_line_width(j*boxSize, 0, j*boxSize, room_height, 1);
}

// Display values
for (var i = 0; i < gridWidth; i+=1) {
    for (var j = 0; j < gridHeight; j+=1) {
        var _value = array_get(global.grid[i], j);
        if(_value != 0) {
            draw_set_color(c_red);
            draw_rectangle(i * boxSize, j * boxSize, i * boxSize + boxSize, j * boxSize + boxSize, false);
        }

    }
}

// Reset opacity & color
draw_set_color(c_white);
draw_set_alpha(1);
- The values contained for each iteration are retrieved with
array_get(global.grid[i], j) - And finally, if it’s different from 0, which is our base value, we display a red rectangle with
draw_rectangle()
Conclusion
We have a grid, which contains the walls of our room, and we know how to detect them. And that’s all for this tutorial! Here’s what you can do next:
- Add more than one object per cell
- Destroy a wall when clicking on the right cell
- Add elements on the fly
- Move a character cell by cell while checking for collisions
- Or even use pathfinding algorithms to ensure a path is available
If you have any questions about this tutorial or specific needs, let me know in the comments so we can discuss it together.
See you!